Transform your home with expert craftsmanship! From loft conversions and home extensions to roof repairs and plastering, we offer full-scale building and renovation services across London, Berkshire, Slough, Bracknell, and Reading. Whether you're upgrading or expanding – we’ve got you covered.
Book A Free Consultation
How to Render and Plaster a Brick Wall?
Rendering and plastering a brick wall enhances the aesthetic appeal of your property and adds an extra layer of protection against the elements. Applying an external wall render shields the structure from weather conditions, reducing moisture penetration and preventing damage over time. From tackling uneven surfaces to addressing moisture challenges, this guide will help you achieve professional results. Whether you're preparing your home for an exterior makeover or refurbishing an old wall, applying render and plaster requires the right tools, technique, and patience. In this guide, we’ll walk you through the entire process, step by step, while offering helpful tips.
Proper surface preparation is essential before you start plastering and rendering. If the brick wall is dirty or has loose mortar, it’s important to clean it thoroughly. A pressure washer can be used for this purpose, but allow the surface to dry completely before moving on. Any existing cracks or holes in the wall should be filled with a suitable filler to ensure the surface is smooth and even.
Tip: Consider applying a bonding agent to the wall for better adhesion, especially if the surface is smooth or non-porous.
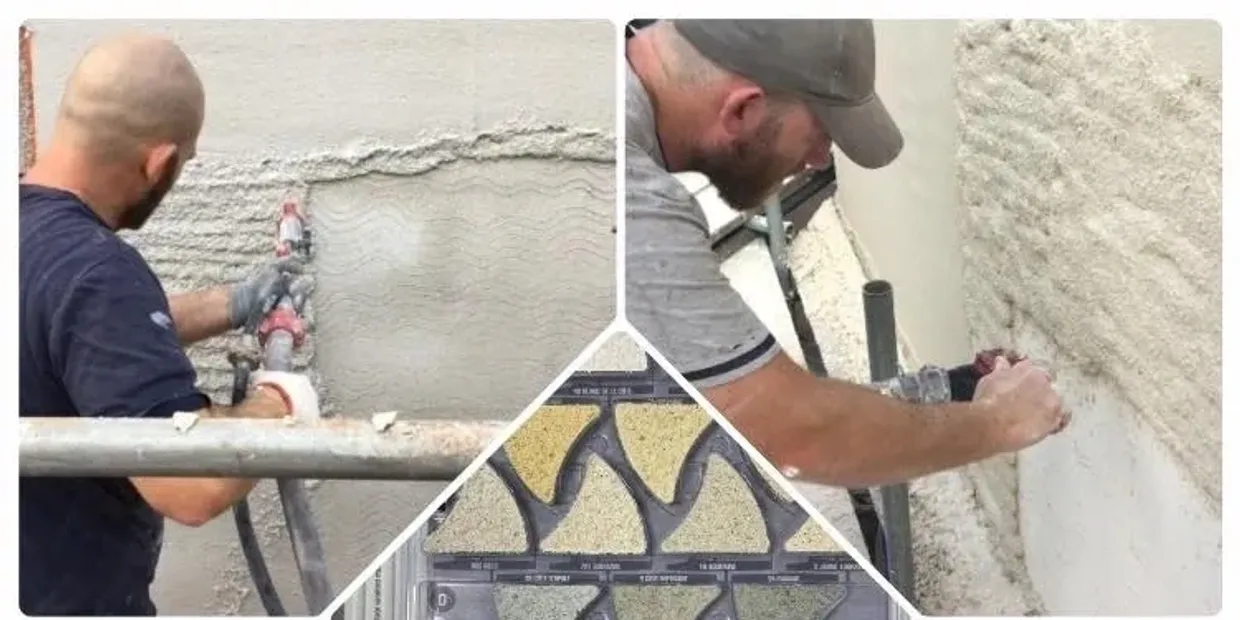
The base coat, or the render, is the first layer to be applied. This is typically a mixture of sand, cement, and lime, a strong foundation for the plaster. Use a trowel to spread the render evenly across the brick wall. Start from the bottom and work your way up to ensure the render doesn’t slide down the wall as you work.
The render should be thick but spreadable to achieve the right consistency. The base coat should be applied in layers of about 6mm. Allow the first coat to set for at least 24 hours before proceeding.
Tip: If you're dealing with a particularly porous brick wall, apply a second coat of render for better coverage and a more durable finish.
Once the render has set, it’s time to apply the plaster. Plastering & rendering are the final steps in giving your wall a polished and protective finish. The plaster mix typically consists of Paris, lime, and sand plaster.
Using a clean trowel, apply a thin layer of plaster over the render, smoothing it out as you go. Start at the top of the wall and gradually work your way down. It’s important to keep the plaster consistent in thickness—about 2mm to 3mm should be enough.
Tip: For a smoother finish, you can use a plastering float. This tool helps to level the plaster and eliminate any unwanted trowel marks.
Once the plaster has been applied, let it set for a few hours until it’s firm to the touch. Now’s the time to do any final smoothing. Gently polish the surface using a damp sponge, ensuring a flawless, smooth finish. Be careful not to over-wet the surface, as it can cause the plaster to lift.
After finishing the plastering process, leave the wall to dry fully, which can take 2 to 3 days. Ensure the wall isn’t exposed to direct sunlight during the drying process, as this could cause cracking.
Tip: If you’re aiming for a textured finish, use a sponge or brush to apply subtle patterns to the plaster while it’s still wet. This can add depth and character to your wall.
Regarding plastering and rendering, Kromrych Builders is the ideal choice for your project. Here’s why we are your trusted partners:
Proper rendering and plastering are essential to protect your brick walls and enhance their visual appeal. With the right preparation, tools, and techniques, you can achieve a smooth and durable finish that improves both the aesthetics and longevity of your walls. Whether you choose to take on the project yourself or hire professionals, following these steps ensures the best results for your home.
Transform your brick walls today with Kromrych Builders. Call us now for a free consultation and let our rendering specialists bring your vision to life.
Ans: Rendering is typically used on external walls for protection and weatherproofing, while plastering is applied to internal walls for a smooth, aesthetic finish.
Ans: Render usually sets in 24-48 hours, while plastering can take 2-3 days to fully dry, depending on the thickness and environmental conditions.
Ans: Yes, as long as the wall is clean and prepared properly. For porous or uneven walls, a bonding agent may be needed to ensure good adhesion.
Ready to bring your home vision to life? Our experienced team delivers top-quality construction, repairs, and refurbishments in London, Berkshire, Slough, Bracknell, and Reading - on time and within budget. Let’s turn your ideas into reality today!
Book A Free Consultation